Welcome to the MetaMetaMeta is a term that refers to the inside workings of a group. For us, this is the team that works on internal WordPress sites like WordCamp Central and Make WordPress. Team!
The Meta team is responsible for maintaining and managing WordPress.orgWordPress.orgThe community site where WordPress code is created and shared by the users. This is where you can download the source code for WordPress core, plugins and themes as well as the central location for community conversations and organization. https://wordpress.org/ websites. Our work is mostly done on the meta trac. If you see a bug, file a ticket!
Every team gets a free site on make.wordpress.orgWordPress.orgThe community site where WordPress code is created and shared by the users. This is where you can download the source code for WordPress core, plugins and themes as well as the central location for community conversations and organization. https://wordpress.org/. Currently, we use the P2P2P2 or O2 is the term people use to refer to the Make WordPress blog. It can be found at https://make.wordpress.org/. theme on all team sites. If you’re starting a new team or (more likely) splitting off from another team, contact the team in #metaMetaMeta is a term that refers to the inside workings of a group. For us, this is the team that works on internal WordPress sites like WordCamp Central and Make WordPress. about your needs.
Only WordPress.org super admins can perform the initial setup.
Because WordPress is wonderful, all you’ll need to do is create a new site in WordPress and “flip the switch.” Ensure that the “P2 for make.wordpress.org” theme is enabled and the only one installed on the site.
But if you have to, contact @coffee2code or @Otto42 and have them do it for you. There are interesting weird situations on WordPress.org with migrating content from one make site to another. The regular Import tool has been disabled for this reason.
Hopefully, the new team will want a handbook! Setting up the handbook only requires enabling the handbook pluginPluginA plugin is a piece of software containing a group of functions that can be added to a WordPress website. They can extend functionality or add new features to your WordPress websites. WordPress plugins are written in the PHP programming language and integrate seamlessly with WordPress. These can be free in the WordPress.org Plugin Directory https://wordpress.org/plugins/ or can be cost-based plugin from a third-party and following the process outlined in this documentation.
Most teams have a “blue box” on their homepage with an introduction on how to get involved and other related information (notably, this team does not).
To add a “blue box” to a team’s homepage, do the follow:
Create a new page called “Welcome” with the slug of “welcome.”
Copy the HTMLHTMLHTML is an acronym for Hyper Text Markup Language. It is a markup language that is used in the development of web pages and websites. from another team’s welcome page and paste it into the new page.
Brief summary of the team (see the homepage for examples)
Weekly chat time and day
One you’ve received that information, you’ll need to update WordPress.org in a couple of places.
The icon in the <h2> headerHeaderThe header of your site is typically the first thing people will experience. The masthead or header art located across the top of your page is part of the look and feel of your website. It can influence a visitor’s opinion about your content and you/ your organization’s brand. It may also look different on different screen sizes. of each make site is updated in wp4.css.
Teams can have a badge listed on members profiles, for this we need to know a few pieces of information:
What badges the team needs, commonly this will be “Make Team” and “Make Team Contributors”, but this can be customized (for example, ‘Plugin Authors’) or skip the Contributors badge entirely.
The color & icon for the badges. See Profile Badges for existing teams.
Ideally a dashicon should be used here, but SVG can also be used.
This should match the icon used for the Make homepage.
The list of initial members of each badge, and who needs to be able to assign them.
Badges are implemented as BuddyPress groups, to create the new badges you’ll need to..
Create the BuddyPress groups through profiles.wordpress.org/wp-admin, keep the groups set as private.
Setup the new badges in wporg_profiles_get_association_classes() in themes/profiles.wordpress.org/functions.php
Setup the new badges themes/profiles.wordpress.org/style.css, search for the existing .badge and copy an existing teams styles for the new style.
Note: Pay attention to the team styles, the main team should have a solid background, and the contributors group should have a white background
Please note: The code behind profiles.wordpress.org is currently not open-sourced, this step needs to be done by a member of the WordPress.org meta team.
If the Make team has a GitHubGitHubGitHub is a website that offers online implementation of git repositories that can easily be shared, copied and modified by other developers. Public repositories are free to host, private repositories require a paid subscription. GitHub introduced the concept of the ‘pull request’ where code changes done in branches by contributors can be reviewed and discussed before being merged be the repository owner. https://github.com/ team, after the site is created you should also enable the GitHub Invite Member tool for their site. Visit Tools -> Invite GitHub Member as a super-admin and enable the GitHub team for their site.
Note: The list of teams is cached, if you only just created the team on GitHub, you may need to wait an hour.
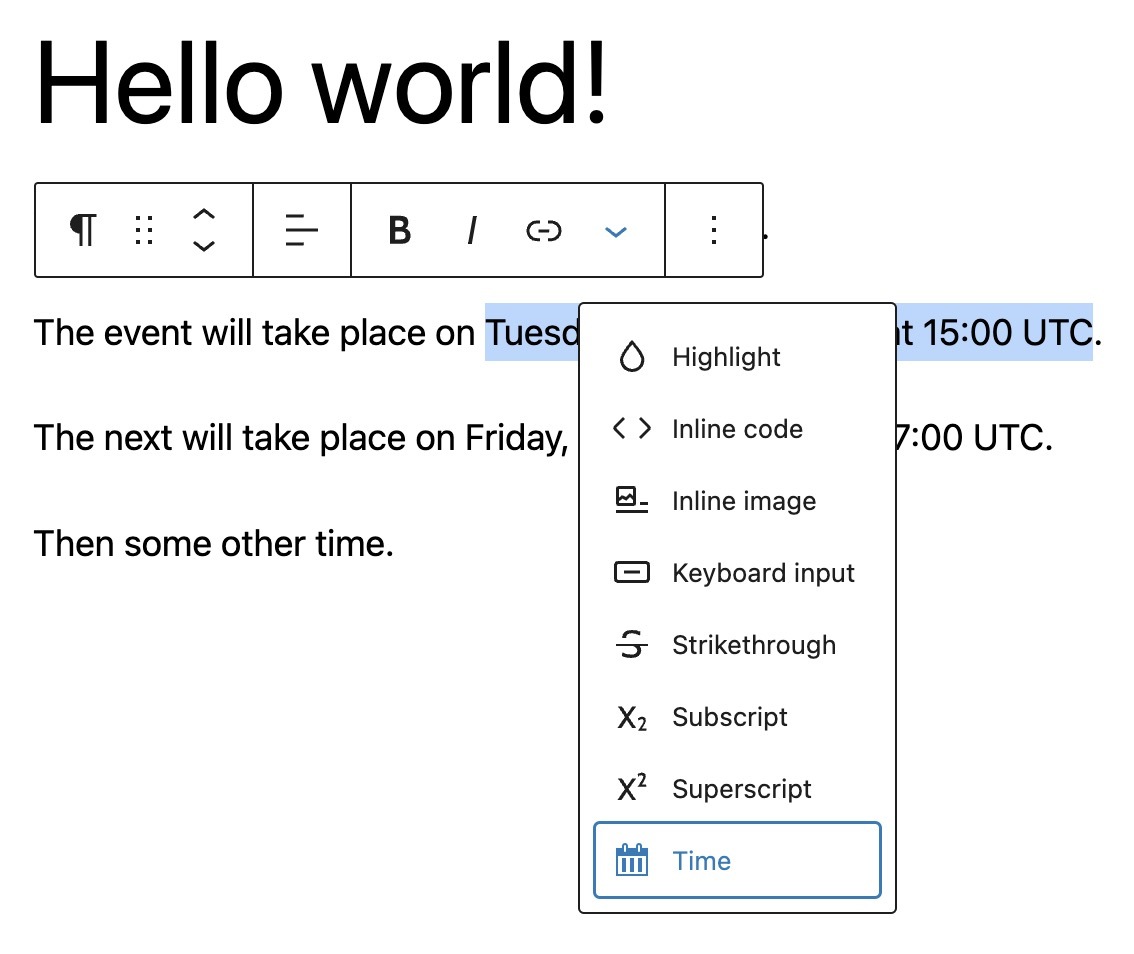
If you create content on a WordPress.org blog, you can leverage a time format to improve how time zones are displayed when sharing dates and times.
When typing your date, use the following format: Thursday, July 20, 2023 at 16:00 UTC
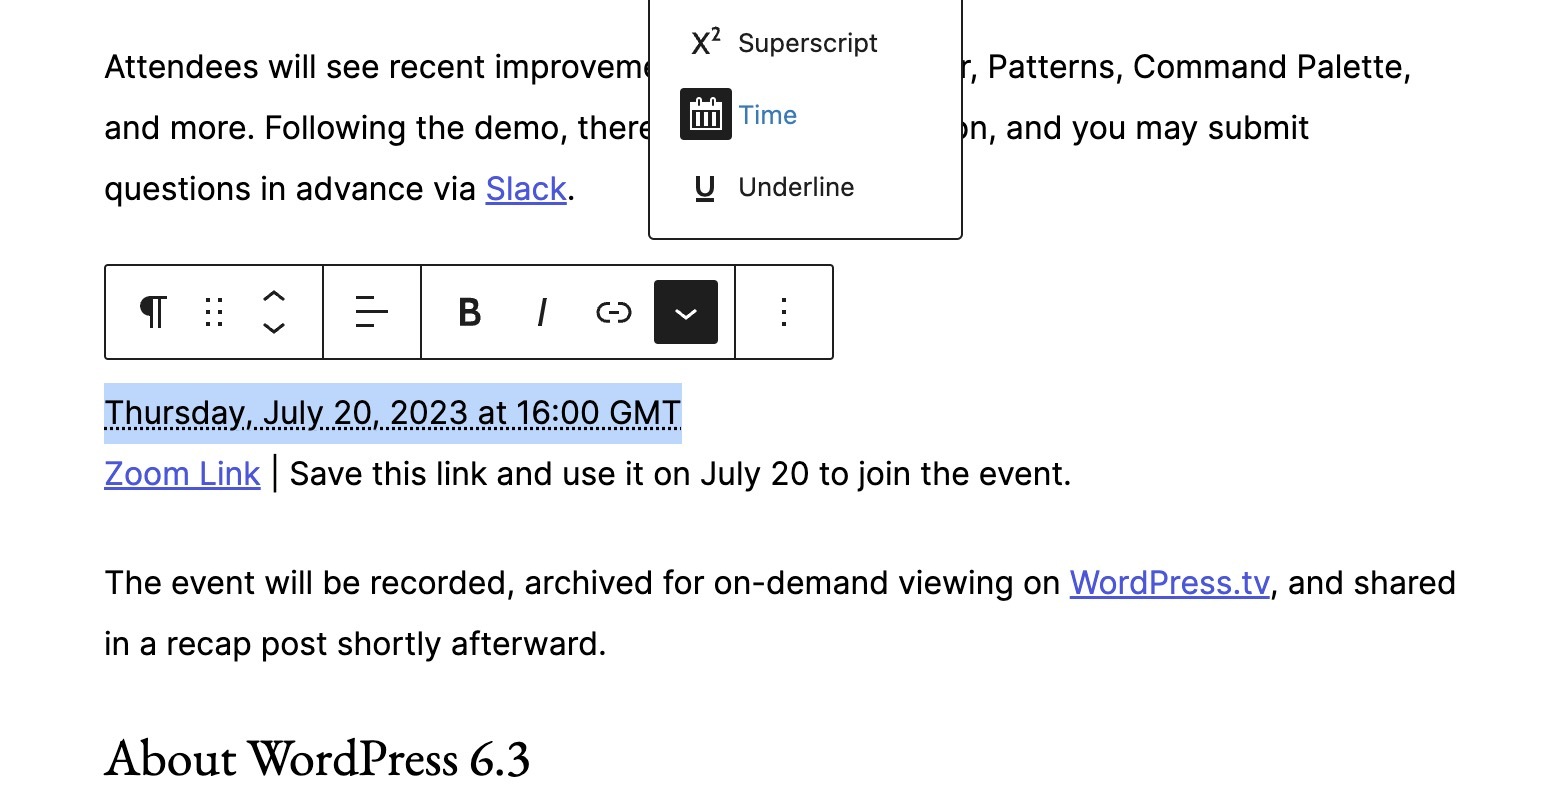
Then, highlight the timestamp, right-click, and select the “Time” menu item from the GutenbergGutenbergThe Gutenberg project is the new Editor Interface for WordPress. The editor improves the process and experience of creating new content, making writing rich content much simpler. It uses ‘blocks’ to add richness rather than shortcodes, custom HTML etc. https://wordpress.org/gutenberg/ rich text toolbar.
Selecting “Time” from the Gutenberg rich text toolbar in the post editor.
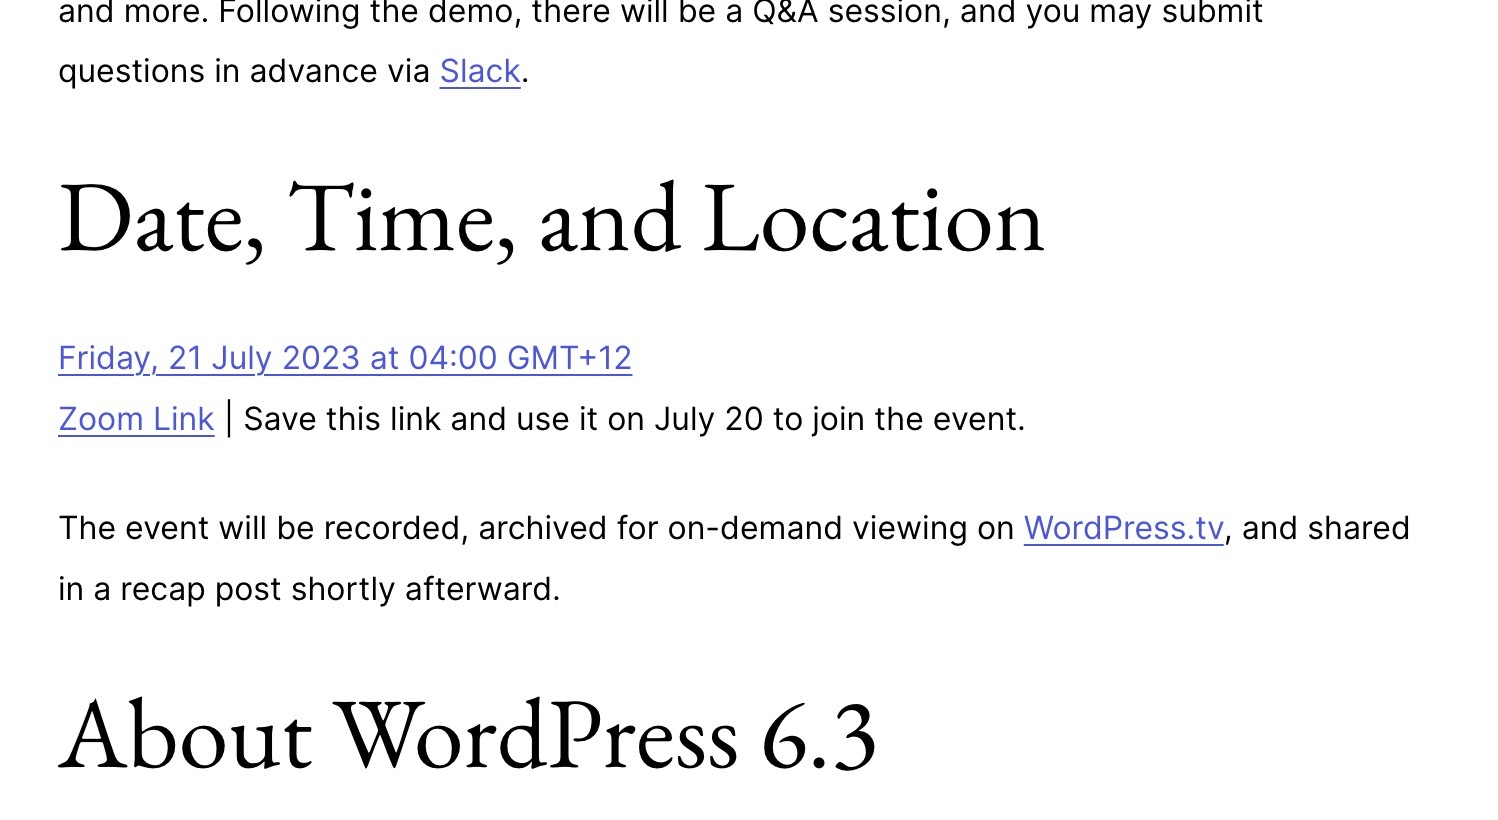
When your content is published, viewers will see the date displayed in the local timezone of their system.
The timestamp has been formatted with the “Time” option.
The end user sees the timestamp in their local timezone.